Time Series Tech Stacks for the IoT Edge
Posted by: Michael Hall in Influx, IoT 2 years, 6 months ago
If you watched my All Things Open talk and want to get links to the projects I references, you can get my slide deck from here: https://www.slideshare.net/influxdata/time-series-tech-stack-for-the-iot-edge
Before You Take Your Conference Online
Posted by: Michael Hall 4 years ago
The Covid-19 global pandemic and subsequent shutdowns of travel and social gatherings has forced many tech conferences to cancel their planned events this year. Many of you are going to try holding your events online, using video conferencing tools and live chat to try and replicate the conference experience without people having to travel somewhere and gather in one place. This is a laudable goal, especially given the lack of better options at the moment, but it's not as simple and straightforward to do as it may sound. I know, I did it back in 2013.
Joining InfluxData and the future of time-series data
Posted by: Michael Hall in Community, Influx, IoT 4 years, 4 months ago
Joining Influx
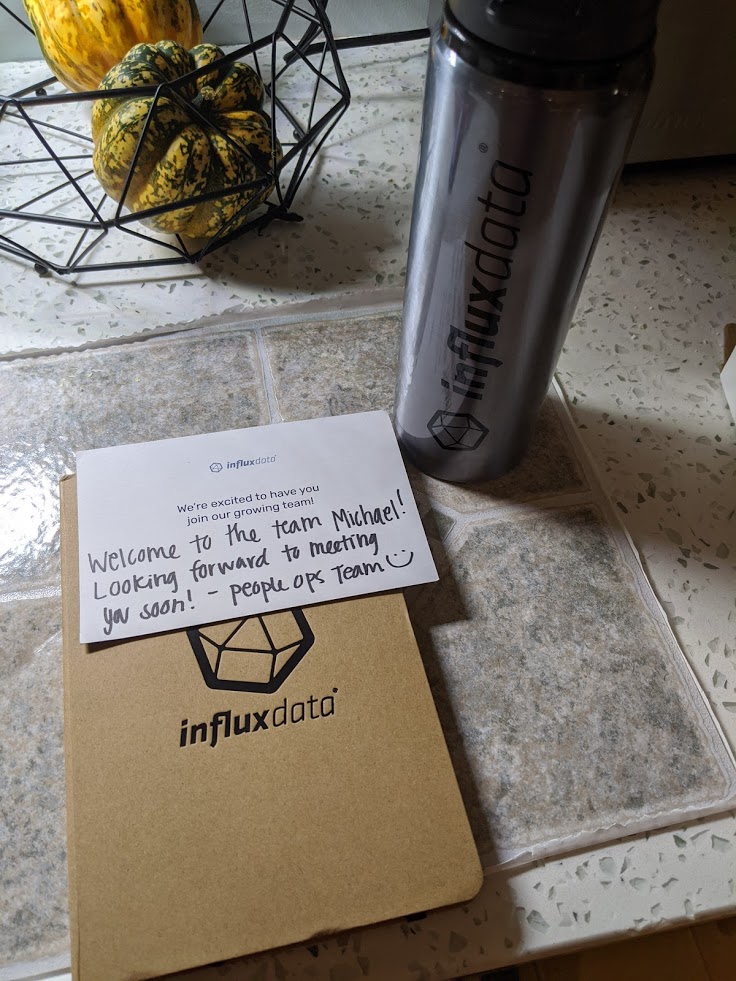 After supporting developer relations for the Linux Foundation's LF Edge projects for the past 18 months, I've decided to get back into Community Management. So I'm excited that next year I will be joining the team at InfluxData helping them build a community around the software they are developing. Anybody who knows me knows how big I am about advocating for Open Source Software, both from an engineering and community perspective, and InfluxData has a number of solid open source products they develop, such as InfluxDB & Telegraf, each with a large user community already. I see an opportunity here to build and grow that community into a driving force behind these products, working together with InfluxData to enhance them to meet the next generation of engineering needs coming with the Internet of Things and Edge computing.
Turn your RaspberryPi into an Smart IoT Device, no coding required!
Posted by: Michael Hall in EdgeX Foundry, IoT, Linux Foundation 4 years, 6 months ago
A lot of of us have a Raspberry Pi, many of us have more than one, and some have probably an excessive amount. And who can blame us? A micro-computer that you can plug regular USB peripherals into, has HDMI out, wireless networking (on later models), low power consumption and can run your favorite Linux distro, all for just $35? Frankly it’s amazing we don’t all have more than we do. But what are we doing with them?
In recent purely non-scientific Twitter poll I asked my followers just that: What are you using your RaspberryPi for? Not surprisingly some people are running a Linux desktop on them, and several are running fun or useful software on them like PiHole, RetroPi, or even just as a mini file server. But only about 20% of the people who responded were making use of one fantastic thing about the Pi: It’s GPIO pins. In fact, most people (35%) said their Pi was just sitting on a shelf not doing anything!
Well my friends, nothing makes this foodie nerd sadder than a wasted Pi. So blow the dust off that little board of yours and grab some LEDs or whatever sensors you might have, because in 10 minutes we’re going to turn that shelf decoration of yours into a functional smart IoT device!
Joining the Linux Foundation
Posted by: Michael Hall in Linux, Linux Foundation, Planet Ubuntu 5 years, 9 months ago
This week I began a new chapter in my career by joinging the Linux Foundation as a developer advocate and community manager for the EdgeX Foundry, an open platform for IoT edge computing.
Recent Posts
- Time Series Tech Stacks for the IoT Edge
- Before You Take Your Conference Online
- Joining InfluxData and the future of time-series data
- Turn your RaspberryPi into an Smart IoT Device, no coding required!
- Joining the Linux Foundation
Archive
2021
- October (1)
2020
- April (1)
2019
2018
2017
2016
2011
- February (1)
Categories
- Archive (11)
- Community (1)
- EdgeX Foundry (1)
- Influx (2)
- IoT (3)
- Linux (1)
- Linux Foundation (2)
- Planet Ubuntu (1)
Authors
- Michael Hall (17)